128
Performing Day to Day Tasks
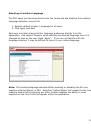
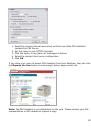
Depending on the degree of automation set up during initial configuration, PSV can
essentially run in the background on autopilot and only alert you when a device
needs attention, or to deliver reports. But there will always be situations where
you need to access PSV to check the status of a device, check the level of supplies
or to manually run reports.
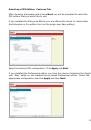
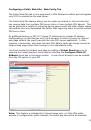
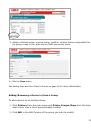
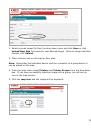
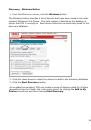
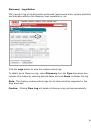
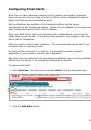
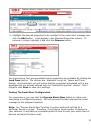
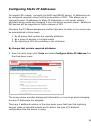
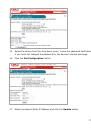
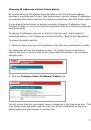
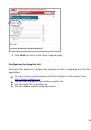
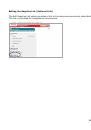
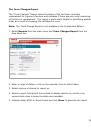
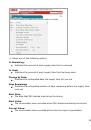
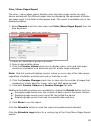
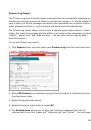
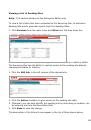
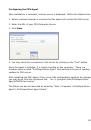
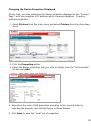
Viewing Device Status
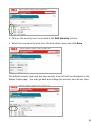
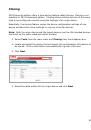
To view a list of devices that was previously discovered:
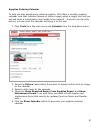
1.
Select
Printers
from the main menu
2.
Click
Printers
,
My printers
, or
Near Me
.
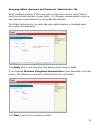
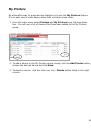
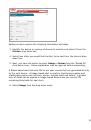
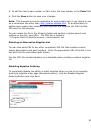
Selecting
“
Printers
”
provides a list of all discovered devices.
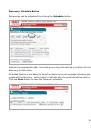
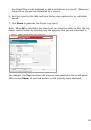
“
My printers
”
displays
only the devices that you previously added to the My Printers group.
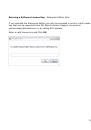
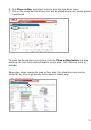
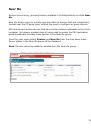
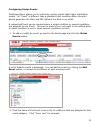
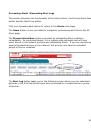
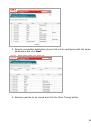
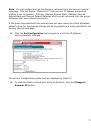
Selecting
“
Near Me
”
automatically displays the print devices that share similar IP
addresses with the computer you are using to access the PSV server. The Near
Me option cannot be customized.
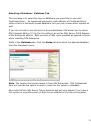
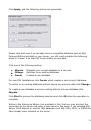
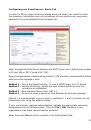
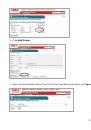
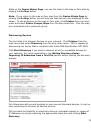
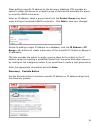
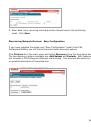
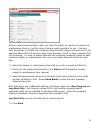
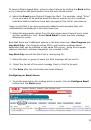
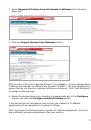
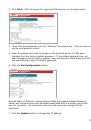
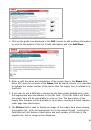
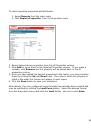
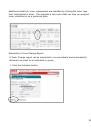
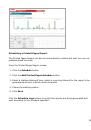
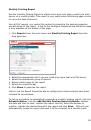
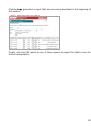
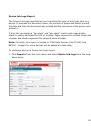
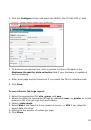
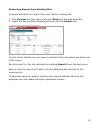
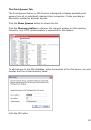
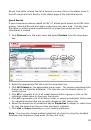
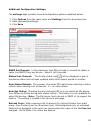
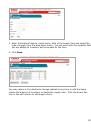
When viewing a long list of devices, make sure to scroll to the bottom of the
screen and click the Refresh button to obtain the most recent status information
on all devices displayed.
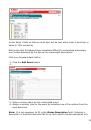
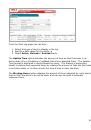
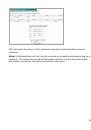
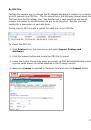
You will notice after clicking Refresh, a teal color moves from line to line indicating
that the device status is being refreshed. Notice too that the printer icons in the
left margin are now color coded to quickly determine the status of the device.
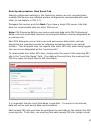
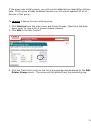
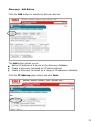
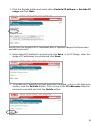
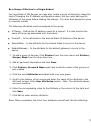
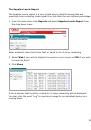
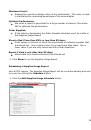
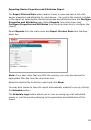
Green indicates that the device is running fine, there are no Alerts and no
supplies need to be ordered
Yellow indicates that an alert has been received, an error has been detected
or a lower level (less critical) action needs to be taken
Red indicates that a critical error or serious Alert has been received and
immediate action is required
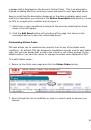
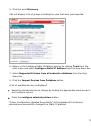
The information icon indicates an event has occurred, such as toner or drum
replacement, cassette drawer is open or the device is printing. Generally no
action is required when the information icon is displayed
The “no access” icon indicates that the device is disconnected from the
network, or is not responding
 1
1
 2
2
 3
3
 4
4
 5
5
 6
6
 7
7
 8
8
 9
9
 10
10
 11
11
 12
12
 13
13
 14
14
 15
15
 16
16
 17
17
 18
18
 19
19
 20
20
 21
21
 22
22
 23
23
 24
24
 25
25
 26
26
 27
27
 28
28
 29
29
 30
30
 31
31
 32
32
 33
33
 34
34
 35
35
 36
36
 37
37
 38
38
 39
39
 40
40
 41
41
 42
42
 43
43
 44
44
 45
45
 46
46
 47
47
 48
48
 49
49
 50
50
 51
51
 52
52
 53
53
 54
54
 55
55
 56
56
 57
57
 58
58
 59
59
 60
60
 61
61
 62
62
 63
63
 64
64
 65
65
 66
66
 67
67
 68
68
 69
69
 70
70
 71
71
 72
72
 73
73
 74
74
 75
75
 76
76
 77
77
 78
78
 79
79
 80
80
 81
81
 82
82
 83
83
 84
84
 85
85
 86
86
 87
87
 88
88
 89
89
 90
90
 91
91
 92
92
 93
93
 94
94
 95
95
 96
96
 97
97
 98
98
 99
99
 100
100
 101
101
 102
102
 103
103
 104
104
 105
105
 106
106
 107
107
 108
108
 109
109
 110
110
 111
111
 112
112
 113
113
 114
114
 115
115
 116
116
 117
117
 118
118
 119
119
 120
120
 121
121
 122
122
 123
123
 124
124
 125
125
 126
126
 127
127
 128
128
 129
129
 130
130
 131
131
 132
132
 133
133
 134
134
 135
135
 136
136
 137
137
 138
138
 139
139
 140
140